
| 일 | 월 | 화 | 수 | 목 | 금 | 토 |
|---|---|---|---|---|---|---|
| 1 | 2 | 3 | ||||
| 4 | 5 | 6 | 7 | 8 | 9 | 10 |
| 11 | 12 | 13 | 14 | 15 | 16 | 17 |
| 18 | 19 | 20 | 21 | 22 | 23 | 24 |
| 25 | 26 | 27 | 28 | 29 | 30 | 31 |
- SwiftUI
- 프로그래머스
- RxSwift
- 회고록
- optional
- FSCalendar
- Firebase
- switch
- ios13
- flatMap
- struct
- Swift
- enum
- 폰트
- Xcode
- swipe
- Realm
- Lifecycle
- 개발후기
- viewcontroller
- API
- http
- TMDB
- ios
- 알고리즘
- typecasting
- LeetCode
- Crashlytics
- dfs
- SF 폰트
- Today
- Total
Jerry's Bakery
[iOS] iOS Realm Migration(마이그레이션) 하는법 본문
안녕하세요 Jerry입니다.
Realm 데이터베이스를 Migration(마이그레이션) 하는 법에 대해 알아보겠습니다.
iOS를 공부하면서 정리하는 것이기 때문에 미흡한 점이 있을 수 있습니다. 부족한 점에 대해 댓글 남겨주시면 감사하겠습니다.
이 글은 아래 공식문서를 참고했습니다.
Modify an Object Schema - iOS SDK — MongoDB Realm
Docs Home → MongoDB RealmWhen you update your object schema, you must increment the schema version and perform a migration.If your schema update adds optional properties or removes properties, Realm Database can perform the migration automatically. You o
docs.mongodb.com
본 글에서 사용된 버전은 아래와 같습니다.
Xcode: 13.0
Realm: 10.18.0
RealmSwift: 11.4.1
앱에 새로운 기능을 추가하려고 할 때 데이터베이스를 수정해야 하는 경우가 있습니다.
기존 앱을 "버전 1", 새롭게 수정한 앱을 "버전 2"라고 하겠습니다.
버전 1에서 유저 정보를 아래와 같이 아이디, 비밀번호, 이름을 저장한다고 가정해보겠습니다.
class UserInformation: Object {
@Persisted(primaryKey: true) var _id: ObjectId
@Persisted var identifier: String
@Persisted var password: String
@Persisted var name: String
convenience init(identifier: String, password: String, name: String) {
self.init()
self.identifier = identifier
self.password = password
self.name = name
}
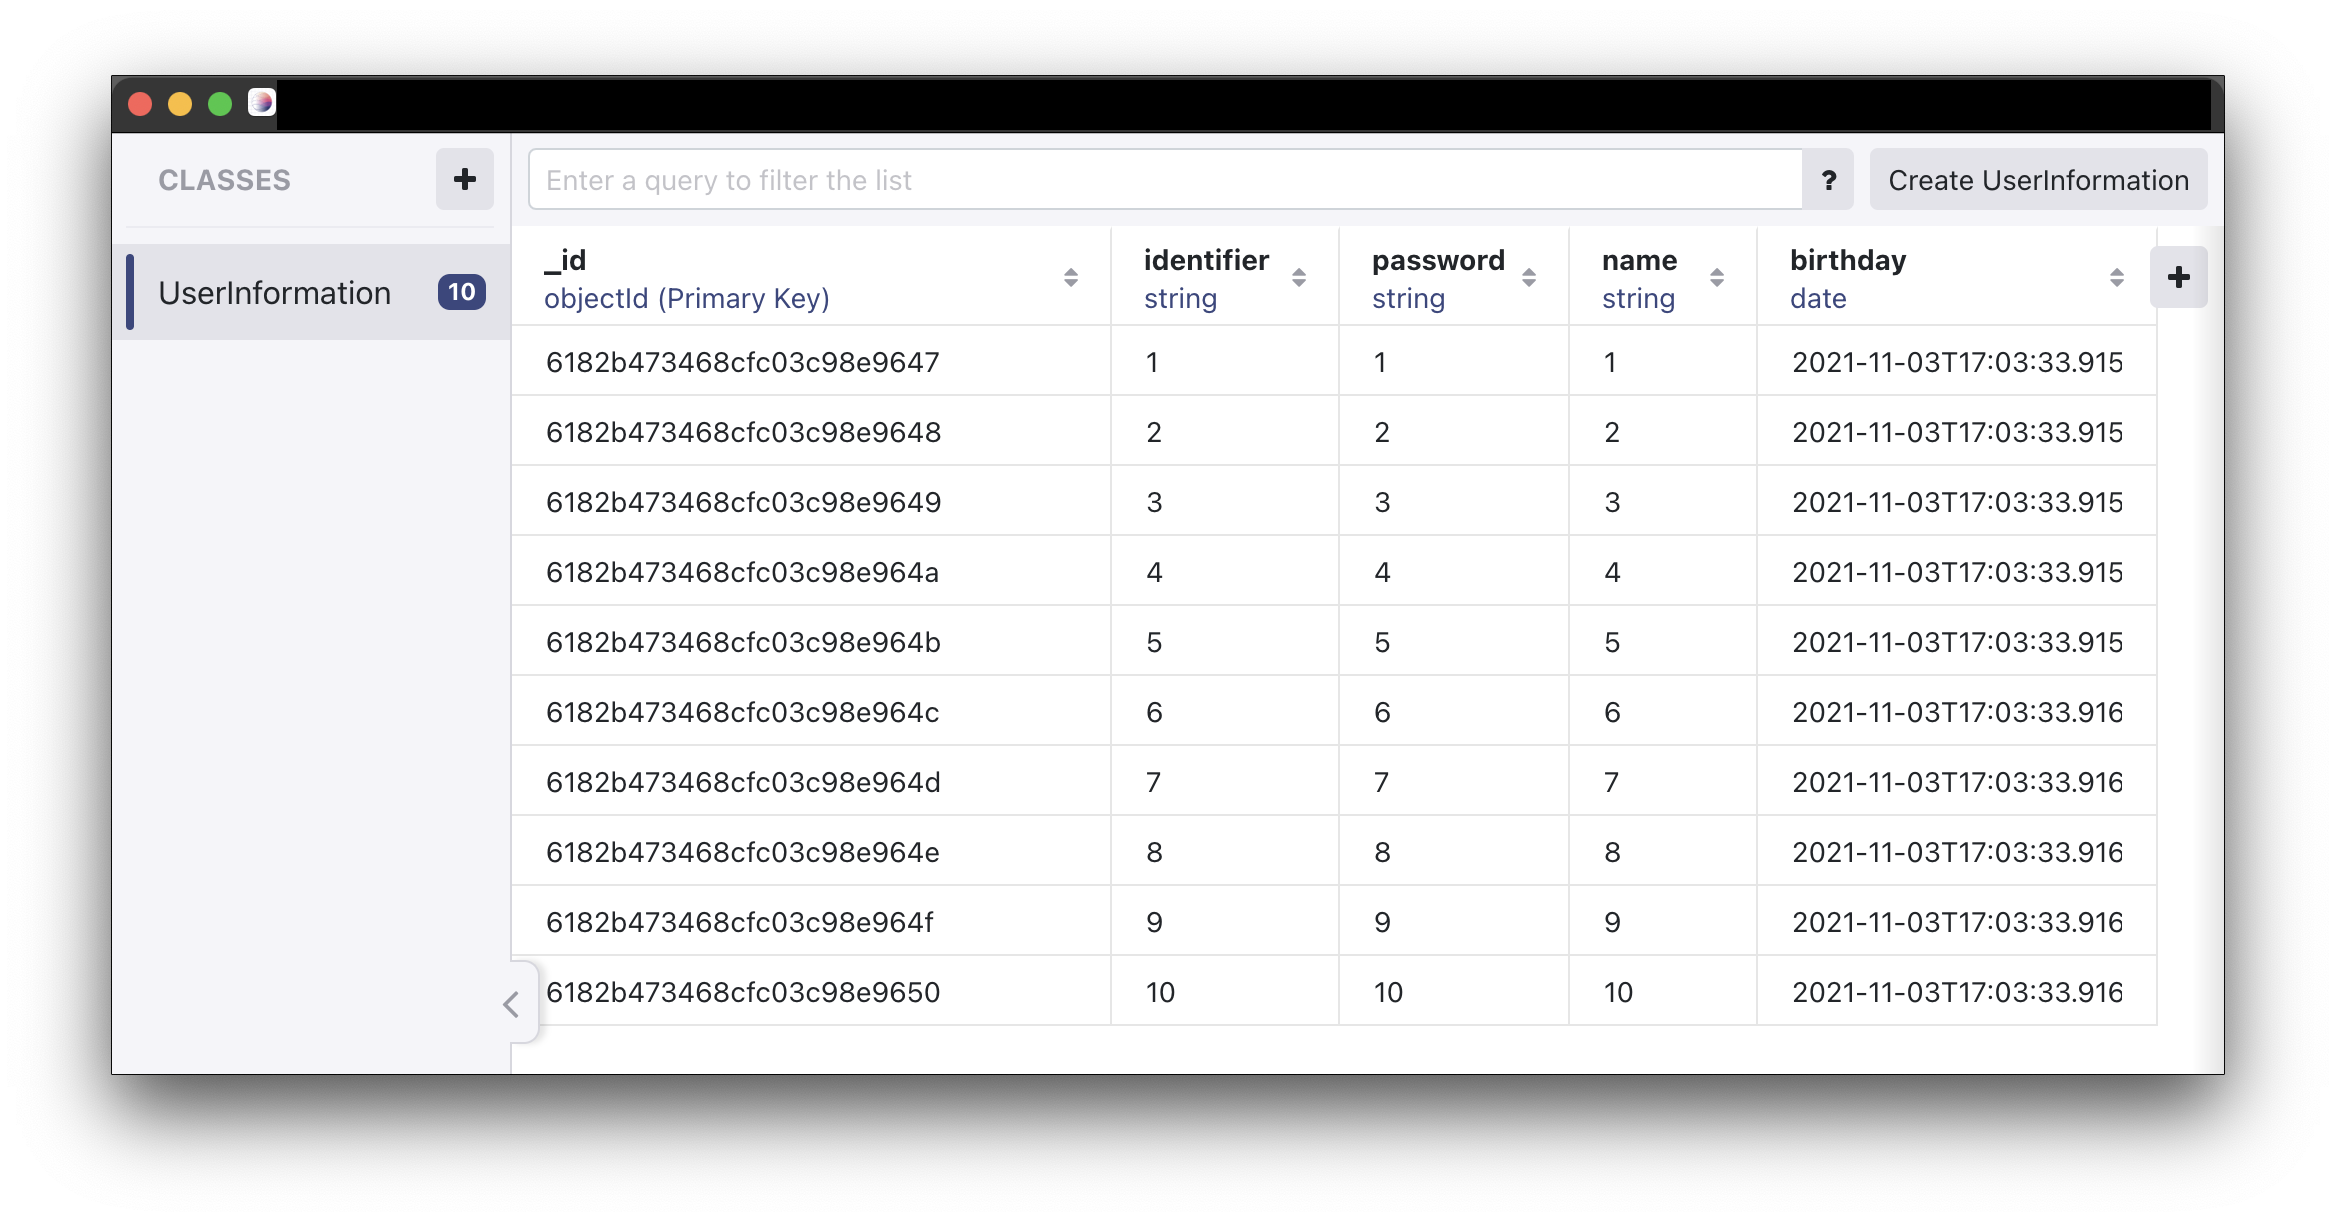
}테스트를 해보기 위해 아래 코드를 추가하고 앱을 빌드하여 10개의 데이터를 넣었습니다. 아래 그림에서 데이터가 올바르게 저장되었음을 확인할 수 있습니다.
import UIKit
import RealmSwift

class ViewController: UIViewController {

    let localRealm = try! Realm()

    var userList: Results<UserInformation>!

    override func viewDidLoad() {
        super.viewDidLoad()

        userList = localRealm.objects(UserInformation.self)

        try! localRealm.write {
            for i in 1...10 {
                localRealm.add(UserInformation(identifier: "\(i)", password: "\(i)", name: "\(i)"))
            }
        }

        // default.realm의 위치
        print(localRealm.configuration.fileURL!)
    }
}
만약 앱에서 생일 관련 기능을 새롭게 추가하고 싶다면 버전 1에는 생일 정보가 없기 때문에 버전 2에서 새롭게 생일 정보를 추가해야 합니다.
아래와 같이 생일 정보를 추가하였습니다.
class UserInformation: Object {
    @Persisted(primaryKey: true) var _id: ObjectId

    @Persisted var identifier: String
    @Persisted var password: String
    @Persisted var name: String
    @Persisted var birthday: Date

    convenience init(identifier: String, password: String, name: String, birthday: Date) {
        self.init()

        self.identifier = identifier
        self.password = password
        self.name = name
        self.birthday = birthday
    }
}
ViewController 코드를 아래와 같이 수정하고 앱을 실행해보겠습니다.
import UIKit
import RealmSwift

class ViewController: UIViewController {

    let localRealm = try! Realm()

    var userList: Results<UserInformation>!

    override func viewDidLoad() {
        super.viewDidLoad()

        userList = localRealm.objects(UserInformation.self)
    }
}
아래와 같이 오류가 발생하는 것을 확인할 수 있습니다.
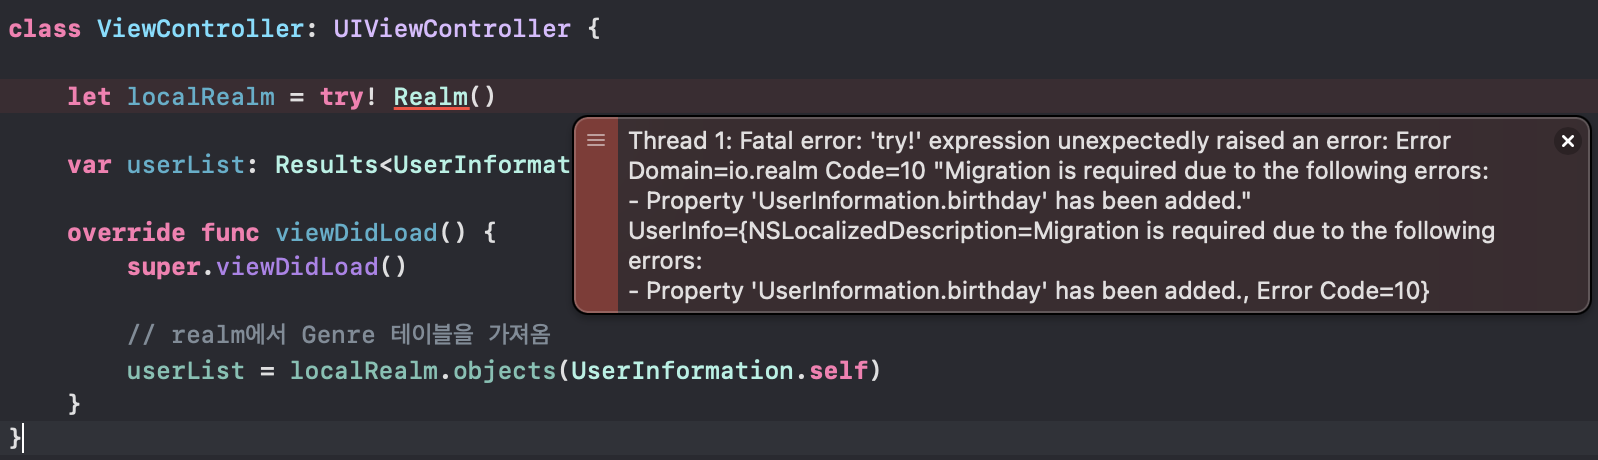
오류를 읽어보니 UserInformation에 birth가 새롭게 추가되었기 때문에 Migration(마이그레이션)이 필요하다는 오류를 발생했습니다.
Migration(마이그레이션)이란?
데이터베이스에서의 마이그레이션은 "데이터베이스의 스키마를 최신 또는 이전 버전으로 업데이트하거나 되돌릴 필요가 있을 때마다 데이터베이스에서 수행되는 과정"입니다.
위 예시를 들면, 버전 1에서 버전 2로 업데이트할 때 데이터베이스의 스키마를 업데이트해야 할 필요가 있기 때문에 마이그레이션을 수행해야 합니다.
마이그레이션을 수행할 때 유의할 점은 "대부분의 스키마 마이그레이션 도구는 데이터베이스의 기존 데이터에 대한 스키마 변경의 영향을 최소화하는 것을 목표로 합니다."입니다.
Realm 마이그레이션 수행 방법
아래 문서를 참고했습니다.
Modify an Object Schema - iOS SDK — MongoDB Realm
Docs Home → MongoDB RealmWhen you update your object schema, you must increment the schema version and perform a migration.If your schema update adds optional properties or removes properties, Realm Database can perform the migration automatically. You o
docs.mongodb.com
마이그레이션을 수행하려면 3가지 과정을 수행해야 합니다.
1. config 설정(이전 버전에서 다음 버전으로 마이그레이션 될 때 어떻게 변경될 것인지)
2. Realm이 새로운 Object를 쓸 수 있도록 설정
3. realm 생성(스키마 처리방법을 알려줬기 때문에 자동으로 Migration을 수행)
코드는 아래와 같습니다. 1, 2번은 AppDelegate의 application(_:didFinishLaunchingWithOptions:) 메서드에서 구현하고, 3번은 ViewController의 ViewDidLoad에 작성했습니다.
import UIKit
import RealmSwift

@main
class AppDelegate: UIResponder, UIApplicationDelegate {

    func application(_ application: UIApplication, didFinishLaunchingWithOptions launchOptions: [UIApplication.LaunchOptionsKey: Any]?) -> Bool {

        // 1. config 설정(이전 버전에서 다음 버전으로 마이그레이션될때 어떻게 변경될것인지)
        let config = Realm.Configuration(
            schemaVersion: 2, // 새로운 스키마 버전 설정
            migrationBlock: { migration, oldSchemaVersion in
                if oldSchemaVersion < 2 {
                    // 1-1. 마이그레이션 수행(버전 2보다 작은 경우 버전 2에 맞게 데이터베이스 수정)
                    migration.enumerateObjects(ofType: UserInformation.className()) { oldObject, newObject in
                        newObject!["birthday"] = Date()
                    }
                }
            }
        )

        // 2. Realm이 새로운 Object를 쓸 수 있도록 설정
        Realm.Configuration.defaultConfiguration = config

        return true
    }
    ...
}
import UIKit
import RealmSwift
class ViewController: UIViewController {
// 3. Realm에게 스키마 처리방법을 알려줬기 때문에 자동으로 Migration을 수행
let realm = try! Realm()
var userList: Results<UserInformation>!
override func viewDidLoad() {
super.viewDidLoad()
userList = realm.objects(UserInformation.self)
}
}다시 앱을 빌드하면 앱이 오류가 발생하지 않는 것을 확인할 수 있고, 데이터베이스를 열어봤을 때 마이그레이션이 올바르게 수행되었음을 확인할 수 있습니다.
'개발 > iOS' 카테고리의 다른 글
| [iOS] Xcode 앱 지원 언어 한국어로 바꾸기 (0) | 2021.12.08 |
|---|---|
| [iOS/Swift] FSCalendar Swipe(스와이프)로 크기조절하는 방법(애니메이션 효과 적용) (0) | 2021.11.21 |
| [iOS] 폰트 적용하는 법 (0) | 2021.11.01 |
| [iOS] Type Casting(타입 캐스팅) (0) | 2021.10.28 |
| [iOS] Xcode13에서 HTTP 통신 사용하는 방법(Use HTTPS instead or add Exception Domains to your app's Info.plist.) (0) | 2021.10.25 |


